Use IAM Roles Anywhere With a Custom Certificate Authority
Posted by Chris McKinnel - 11 July 202210 minute read
Warning: before reading this article, please understand that using Let's Encrypt, or any public CA, as a Trust Anchor is a bad idea. You're basically saying you trust any certificates issued by that public CA.
I had a stand-up argument with one of my customers' vendors recently.
They had deployed an IAM user so they could generate some API keys to feed into an app they had running in ECS instead of using an IAM role, and they refused to concede that using a role and temporary credentials was any more secure than using a user with long-lived credentials.
While this doesn't seem like a big deal on the surface if you're following best practice, there were a few flow on affects from the decision to use a user over a role that were cause for great concern.
Because their app needed API keys, they needed to pass the keys into the
app, somehow. They chose to save the keys in an .env file instead
of in Parameter Store or Secrets Manager, and they also committed this
file to source control.
Two big no-no's, in my opinion.
You've got plaintext credentials that likely grant full access to your app's data, and potentially a lot of access to your AWS environment saved in a place that gets copied to every single one of your developers' machines and every machine the code runs on.
That's a decent attack surface, and it's like Christmas for those naughty people looking to score some privilege escalation.
So, while this vendor had created these problems themselves, others fall into the same traps while being forced to use long-lived API keys by accessing AWS resources from outside of AWS.
Not anymore!
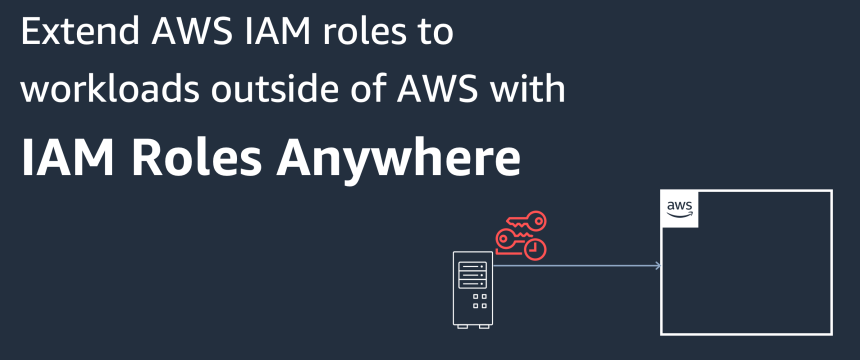
AWS IAM Roles Anywhere
I have to admit that I got a lot of satisfaction when AWS released the IAM Roles Anywhere feature a few days ago. I got to reply to my own rant about security to this vendor with a feature that further invalidated their approach by removing one of the legitimate use-cases for having long-lived API credentials associated to IAM users.
Anyway, putting my ego aside for a second, what is the IAM Roles Anywhere service in a single sentence?
It's a service that allows you to replace your existing long-lived API keys associated with IAM users with X.509 certificates issued by a Certificate Authority that your AWS account trusts.
You create a Trust Anchor by uploading your CA issuer certificate and any certificate it issues can then authenticate to IAM Roles Anywhere and get temporary credentials from STS in the way of API keys and session tokens.
This is awesome if you've already got some Public Key Infrastructure in place, and you've got some maturity / automation around your management and governance of your certificates, but it does mean you might have some admin ahead if you don't. You still have to figure out how to either generate your own CA and certificates, or to (presumably - read on) use existing public CAs, and to keep the private keys private.
Even though it might seem like it's just shifting the long-lived credential burden from API keys to certificates, I think there's a much higher chance you'll be able to wrap the secure granting and revocation of X.509 certificates in automation than generating, rotating and securely sharing API keys from IAM users. Especially because you can generate your own CA, either with AWS' managed Private CA in Certificate Manager, or just using something like Hashicorp's Vault.
Plus, if you've already got a private CA it's happy days for you because you've probably already got the certificates you need.
Anyway, lots of words and no action yet - so let's build something and see if it works.
A basic POC
Unfortunately, the Private CA service that AWS offers via ACM is on the pricey side - it's not designed for hacking together a POC to see how it works. The moment you turn it on, you get whacked with a $400 USD monthly charge, plus a few pennies on top of that for the certs you create using it. It looks like this service hasn't quite got the "pay for what you use" memo, yet!
There's Scot's blood running through my veins, so it took about 5 seconds to decide I would try and get this working with a custom CA instead.
The first thing that sprang to mind was Let's Encrypt. I should be able to generate a free X.509 certificate that is validated by the Let's Encrypt root CA, or its intermediaries, and use that certificate to authenticate to Roles Anywhere and get temporary IAM credentials from STS.
First thing's first, though, let's see if the Terraform AWS Provider supports Roles Anywhere yet...

Damn, an open PR from 16 hours ago. The Terraform contributors are very quick, but we're quicker on the draw this time. Looks like we'll be using CloudFormation for this POC.
It's very refreshing to see a new service launch with CloudFormation and API support out of the box - I get PTSD thinking about how long it took the SSO service to get useful APIs, and it's still not there yet.
IAM Roles Anywhere with a Let's Encrypt certificate and CloudFormation
Warning: before you follow along with this section, understand that using
Let's Encrypt to sign your certificates is not secure.
When I originally wrote this, it didn't occur to me that by using the
Let's Encrypt CA cert as a Trust Anchor, I would be allowing anybody that
had a certificate issued by Let's Encrypt to authenticate to IAM Roles
Anywhere.
And actually using any public CA as a Trust Anchor has the
same issue!
They would still need to know my Trust Anchor, Profile and Role
ARNs - but as we all know, security by obscurity isn't a thing.
In addition to the above, using a Let's Encrypt certificate currently
doesn't work because the IAM Roles Anywhere service can't handle certificates
with an apostrophe in the Issuer or Subject field - I suspect this will be
fixed soon.
There are a couple of prerequisites you need to take care of. If you're attempting this with Let's Encrypt, you'll need to have a public domain name that points to a server somewhere. We'll be using certbot to generate us a certificate and certbot fires up a temporary webserver so it can validate you own the domain before granting the certificate.
I just created a subdomain iam-roles-anywhere.mckinnel.me for
this, and pointed it at a t3.micro instance I created for this testing.
By the time you read this, that subdomain will probably have gone to
Jesus, so don't be surprised if it doesn't lead you anywhere.
So, assuming you've got a domain or a subdomain ready, let's create a CloudFormation template that creates us a basic EC2 instance and installs a couple of bits we need to run certbot.
You could technically do this locally, but you'd need to point your domain at the public IP of your router and figure out how to make it work - it felt like hard work to me.
iam-roles-anywhere-ec2.yml
Parameters:

  ImageId:
    Type: String
    Description: Instance type, defaults to Ubuntu 20.04
    Default: ami-0300dc03c13eb7660

  InstanceType:
    Type: String
    Description: Instance type, defaults to t3.micro
    Default: t3.micro

  KeyPairName:
    Type: String
    Description: Name of the keypair for the EC2 instance
    Default: iam-roles-anywhere-poc

  KeyPairPublicKey:
    Type: String
    Description: SSH Public key for the keypair

  VpcId:
    Type: String
    Description: VPC ID to deploy the instance into

  SubnetId:
    Type: String
    Description: The ID of the subnet to deploy the instance into

  MyPublicIpAddress:
    Type: String
    Description: Go to https://ipv4.icanhazip.com/ and get your public IP

Resources:

  KeyPair:
    Type: AWS::EC2::KeyPair
    Properties:
     KeyName: !Ref KeyPairName
     PublicKeyMaterial: !Ref KeyPairPublicKey

  SecurityGroup:
    Type: AWS::EC2::SecurityGroup
    Properties:
      GroupDescription: IAM Roles Anywhere Security Group
      GroupName: iam-roles-anywhere-poc
      SecurityGroupIngress:
        - CidrIp: 0.0.0.0/0
          Description: Open 80 to allow certbot to validate the domain
          FromPort: 80
          IpProtocol: TCP
          ToPort: 80
        - CidrIp: !Sub ${MyPublicIpAddress}/32
          Description: SSH access from local machine
          FromPort: 22
          IpProtocol: TCP
          ToPort: 22
      SecurityGroupEgress:
        CidrIp: 0.0.0.0/0
        FromPort: -1
        IpProtocol: -1
        ToPort: -1
      VpcId: !Ref VpcId

  Instance:
    Type: AWS::EC2::Instance
    Properties:
      ImageId: !Ref ImageId
      InstanceType: !Ref InstanceType
      KeyName: !Ref KeyPair
      SecurityGroupIds:
        - !Ref SecurityGroup
      SubnetId: !Ref SubnetId
      Tags:
        - Key: "Name"
          Value: "iam-roles-anywhere-poc"
      UserData:
        Fn::Base64: !Sub |
          #!/bin/bash -xe
          snap install core
          snap refresh core
          snap install --classic certbot
          ln -s /snap/bin/certbot /usr/bin/certbot
          apt update
          apt install -y nginx

Outputs:
  PublicIP:
    Description: Public IP address of the instance
    Value: !GetAtt Instance.PublicIp
OK, so what is this CloudFormation template doing? It's dead simple, really:
- Creates a security group that opens port 22 to you and 80 to the world
- Creates a keypair with your public key
- Creates an EC2 instance in the VPC and subnet you provide
- Runs a tiny script to install certbot and nginx (which certbot will use)
Not ideal that we've got port 80 open to the world, so we'll make sure to disable this as soon as our certificate is generated.
Before we run it, let's create a parameters file so our CLI command is easier to run. Make sure you replace the values with your own.
parameters-ec2.json
[
  {
    "ParameterKey": "KeyPairPublicKey",
    "ParameterValue": "YOUR_PUBLIC_KEY"
  },
  {
    "ParameterKey": "VpcId",
    "ParameterValue": "YOUR_VPC_ID"
  },
  {
    "ParameterKey": "SubnetId",
    "ParameterValue": "YOUR_SUBNET_ID"
  },
  {
    "ParameterKey": "MyPublicIpAddress",
    "ParameterValue": "YOUR_PUBLIC_IP"
  }
]
You can use an existing SSH keypair if you have it, or you can generate
a new one using ssh-keygen. You'll find the keys in
~/.ssh/ if you're on a unix-based system. Copy the contents
of the file ending in .pub.
You can get your VPC and Subnet IDs from your AWS console. The default VPC is good for this because it's only got public subnets. You must choose a subnet ID of one of your public subnets, as your EC2 instance needs to get a public IP to temporarily host a website for Let's Encrypt to validate your domain.
You can get your public IP address from https://ipv4.icanhazip.com/.
Let's deploy the template.
aws cloudformation create-stack \
--stack-name iam-roles-anywhere-ec2 \
--template-body file://iam-roles-anywhere-ec2.yml \
--parameters file://parameters-ec2.json

{
    "StackId": "arn:aws:cloudformation:ap-southeast-2:xxxxxxxxxxx:stack/iam-roles-anywhere-poc/2b28ba90-0095-11ed-bb00-06a0ce31cfb0"
}
Hopefully the stack deploys successfully, and when you query it via the CLI you can see the public IP of the instance.
aws cloudformation describe-stacks \
--stack-name iam-roles-anywhere-poc \
--query "Stacks[0].Outputs" \
--output text

Public IP address of the instance       PublicIP        xx.xx.xx.xx
Let's SSH into it using this public IP address and see if it's working as expected.
ssh -i /path/to/your/ssh/private/key ubuntu@xx.xx.xx.xx
ssh -i ~/.ssh/id_rsa ubuntu@x.xx.xx.xxx
The authenticity of host 'x.xx.xx.xxx (x.xx.xx.xxx)' can't be established.
ECDSA key fingerprint is SHA256:xxxx/ISFHlHTaWLlxx/jeYAoxxM.
Are you sure you want to continue connecting (yes/no)? yes

Warning: Permanently added 'x.xx.xx.xxx' (ECDSA) to the list of known hosts.
Welcome to Ubuntu 20.04.4 LTS (GNU/Linux 5.13.0-1029-aws x86_64)
...
Nice, now let's see if certbot is installed (our user data script should have installed it and sym-linked the binary to somewhere on the path).
sudo certbot
Saving debug log to /var/log/letsencrypt/letsencrypt.log
Certbot doesn't know how to automatically configure the web server on this system. However, it can still get a certificate for you. Please run "certbot certonly" to do so. You'll need to manually configure your web server to use the resulting certificate.
Great, now we can use certbot to generate a free Let's Encrypt certificate for us!
Before you do this, you'll need to point your test domain at the public
IP of your instance using an A Record.
Certbot will generate some Nginx config that hosts a file it uses to
validate you own the domain.
sudo certbot certonly --nginx
Saving debug log to /var/log/letsencrypt/letsencrypt.log
Enter email address (used for urgent renewal and security notices)
(Enter 'c' to cancel): chrismckinnel@gmail.com

- - - - - - - - - - - - - - - - - - - - - - - - - - - - - - - - - - - - - - - -
Please read the Terms of Service at https://letsencrypt.org/documents/LE-SA-v1.2-November-15-2017.pdf.
You must agree in order to register with the ACME server. Do you agree?
- - - - - - - - - - - - - - - - - - - - - - - - - - - - - - - - - - - - - - - -
(Y)es/(N)o: y

- - - - - - - - - - - - - - - - - - - - - - - - - - - - - - - - - - - - - - - -
Would you be willing, once your first certificate is successfully issued, to
share your email address with the Electronic Frontier Foundation, a founding
partner of the Let's Encrypt project and the non-profit organization that
develops Certbot? We'd like to send you email about our work encrypting the web,
EFF news, campaigns, and ways to support digital freedom.
- - - - - - - - - - - - - - - - - - - - - - - - - - - - - - - - - - - - - - - -
(Y)es/(N)o: n

Account registered.
Please enter the domain name(s) you would like on your certificate (comma and/or
space separated) (Enter 'c' to cancel): iam-roles-anywhere.mckinnel.me
Requesting a certificate for iam-roles-anywhere.mckinnel.me

Successfully received certificate.
Certificate is saved at: /etc/letsencrypt/live/iam-roles-anywhere.mckinnel.me/fullchain.pem
Key is saved at:         /etc/letsencrypt/live/iam-roles-anywhere.mckinnel.me/privkey.pem
This certificate expires on 2022-10-08.
These files will be updated when the certificate renews.
Certbot has set up a scheduled task to automatically renew this certificate in the background.

- - - - - - - - - - - - - - - - - - - - - - - - - - - - - - - - - - - - - - - -
If you like Certbot, please consider supporting our work by:
 * Donating to ISRG / Let's Encrypt:   https://letsencrypt.org/donate
 * Donating to EFF:                    https://eff.org/donate-le
- - - - - - - - - - - - - - - - - - - - - - - - - - - - - - - - - - - - - - - -
Now we can view the certificates that have been generated in
/etc/letsencrypt/live/iam-roles-anywhere.mckinnel.me/.
sudo ls -la /etc/letsencrypt/live/iam-roles-anywhere.mckinnel.me/
total 12
drwxr-xr-x 2 root root 4096 Jul 11 00:43 .
drwx------ 3 root root 4096 Jul 11 00:43 ..
-rw-r--r-- 1 root root  692 Jul 11 00:43 README
lrwxrwxrwx 1 root root   54 Jul 11 00:43 cert.pem -> ../../archive/iam-roles-anywhere.mckinnel.me/cert1.pem
lrwxrwxrwx 1 root root   55 Jul 11 00:43 chain.pem -> ../../archive/iam-roles-anywhere.mckinnel.me/chain1.pem
lrwxrwxrwx 1 root root   59 Jul 11 00:43 fullchain.pem -> ../../archive/iam-roles-anywhere.mckinnel.me/fullchain1.pem
lrwxrwxrwx 1 root root   57 Jul 11 00:43 privkey.pem -> ../../archive/iam-roles-anywhere.mckinnel.me/privkey1.pem
You can see we get an end-cert (cert1.pem), a private key
(privkey1.pem) an intermediary chain (chain1.pem)
and a full chain (fullchain1.pem).
We'll be using the chain1.pem certificate as our Trust Anchor,
and we'll be using the end-cert and private key to sign our request to
IAM Roles Anywhere, which will get validated against the Trust Anchor.
Before continuing, let's update our stack to close off port 80 to the world. You can do this by removing the following block:
remove this block from iam-roles-anywhere-ec2.yml
- CidrIp: 0.0.0.0/0
  Description: Open 80 to allow certbot to validate the domain
  FromPort: 80
  IpProtocol: TCP
  ToPort: 80
Once removed, run the following command to update the stack.
aws cloudformation update-stack \
--stack-name iam-roles-anywhere-ec2 \
--template-body file://iam-roles-anywhere-ec2.yml \
--parameters file://parameters-ec2.json
Create the IAM Roles, Trust Anchor and Profile
Now that we've got our certificates generated, we need to set up IAM Roles Anywhere so it knows how to validate our signed requests for temporary credentials.
First, we need to create an IAM role that trusts IAM Roles Anywhere to assume it. This role will be the one we configure it to assume with the same permission policy that we would previously have had to grant an IAM user with long-lived API keys.
We'll also create an S3 bucket that we'll grant the role access to. Our test to see if this thing works will be whether we can copy a file to this bucket.
Finally, we'll create a Trust Anchor and Profile, which will establish how IAM Roles Anywhere knows it can trust our signed messages, and will link up our Trust Anchor with an IAM role.
iam-roles-anywhere.yml
Parameters:

  ChainBundle:
    Type: String
    Description: Certificate of your trust anchor in PEM format

Resources:

  IAMAnywhereTestBucket:
    Type: AWS::S3::Bucket

  IAMRole:
    Type: AWS::IAM::Role
    Properties:
      AssumeRolePolicyDocument:
        Version: "2012-10-17"
        Statement:
          - Effect: Allow
            Principal:
              Service:
                - rolesanywhere.amazonaws.com
            Action:
              - "sts:AssumeRole"
              - "sts:SetSourceIdentity"
              - "sts:TagSession"
      Path: /
      Policies:
        - PolicyName: iam-roles-anywhere-poc
          PolicyDocument:
            Version: "2012-10-17"
            Statement:
              - Effect: Allow
                Action: 's3:PutObject'
                Resource: !Sub ${IAMAnywhereTestBucket.Arn}/*

  TrustAnchor:
    Type: AWS::RolesAnywhere::TrustAnchor
    Properties:
      Enabled: True
      Name: iam-roles-anywhere-poc
      Source:
        SourceData: {
          "X509CertificateData": !Ref ChainBundle
        }
        SourceType: CERTIFICATE_BUNDLE

  Profile:
    Type: AWS::RolesAnywhere::Profile
    Properties:
      DurationSeconds: 3600
      Name: iam-roles-anywhere-poc
      RoleArns:
        - !GetAtt IAMRole.Arn

Outputs:

  S3BucketName:
    Description: Name of the S3 bucket created
    Value: !Ref IAMAnywhereTestBucket

  TrustAnchorArn:
    Description: Arn of the IAM Roles Anywhere Trust Anchor
    Value: !GetAtt TrustAnchor.TrustAnchorArn

  ProfileArn:
    Description: Arn of the IAM Roles Anywhere Profile
    Value: !GetAtt Profile.ProfileArn
Let's step through what this CloudFormation template is doing:
- Create an S3 bucket that we'll use to test our permissions
- Create an IAM Role that we'll assume via IAM Roles Anywhere
- Create a IAM Roles Anywhere Trust Anchor with our CA bundle
- Create an IAM Roles Anywhere Profile to link the role
- Add a couple of outputs so we can easily get ARNs of the resources from the CLI
We need to create a parameters file as well, which will contain our certificate bundle in PEM format.
parameters.json
[
  {
    "ParameterKey": "ChainBundle",
    "ParameterValue": "-----BEGIN CERTIFICATE-----\nMIIFFjCCAv6gAwIBAgIRAJErCErPDBinU/bWLiWnX1owDQYJKoZIhvcNAQELBQAw\nTzELMAkGA1UEBhMCVVMxKTAnBgNVBAoTIEludGVybmV0IFNlY3VyaXR5IFJlc2Vh\ncmNoIEdyb3VwMRUwEwYDVQQDEwxJU1JHIFJvb3QgWDEwHhcNMjAwOTA0MDAwMDAw\nWhcNMjUwOTE1MTYwMDAwWjAyMQswCQYDVQQGEwJVUzEWMBQGA1UEChMNTGV0J3Mg\nRW5jcnlwdDELMAkGA1UEAxMCUjMwggEiMA0GCSqGSIb3DQEBAQUAA4IBDwAwggEK\nAoIBAQC7AhUozPaglNMPEuyNV...==\n-----END CERTIFICATE-----"
  }
]
The value of your ChainBundle parameter will be the first
certificate in the chain1.pem file that certbot generated
earlier. Because we're using a Let's Encrypt certificate, we need to pass
in the intermediary CA so IAM Roles Anywhere knows it can trust certificates
that were issued by this CA.
When passing this certificate, you need to put it all on one line and replace the line endings with the newline character. I've left a snippet of mine above so you can see the format.
OK, let's deploy the stack!
aws cloudformation create-stack \
--stack-name iam-roles-anywhere \
--template-body file://iam-roles-anywhere.yml \
--parameters file://parameters.json \
--capabilities CAPABILITY_IAM
{
"StackId": "arn:aws:cloudformation:ap-southeast-2:xxxxxxxxxxx:stack/iam-roles-anywhere/xxxx"
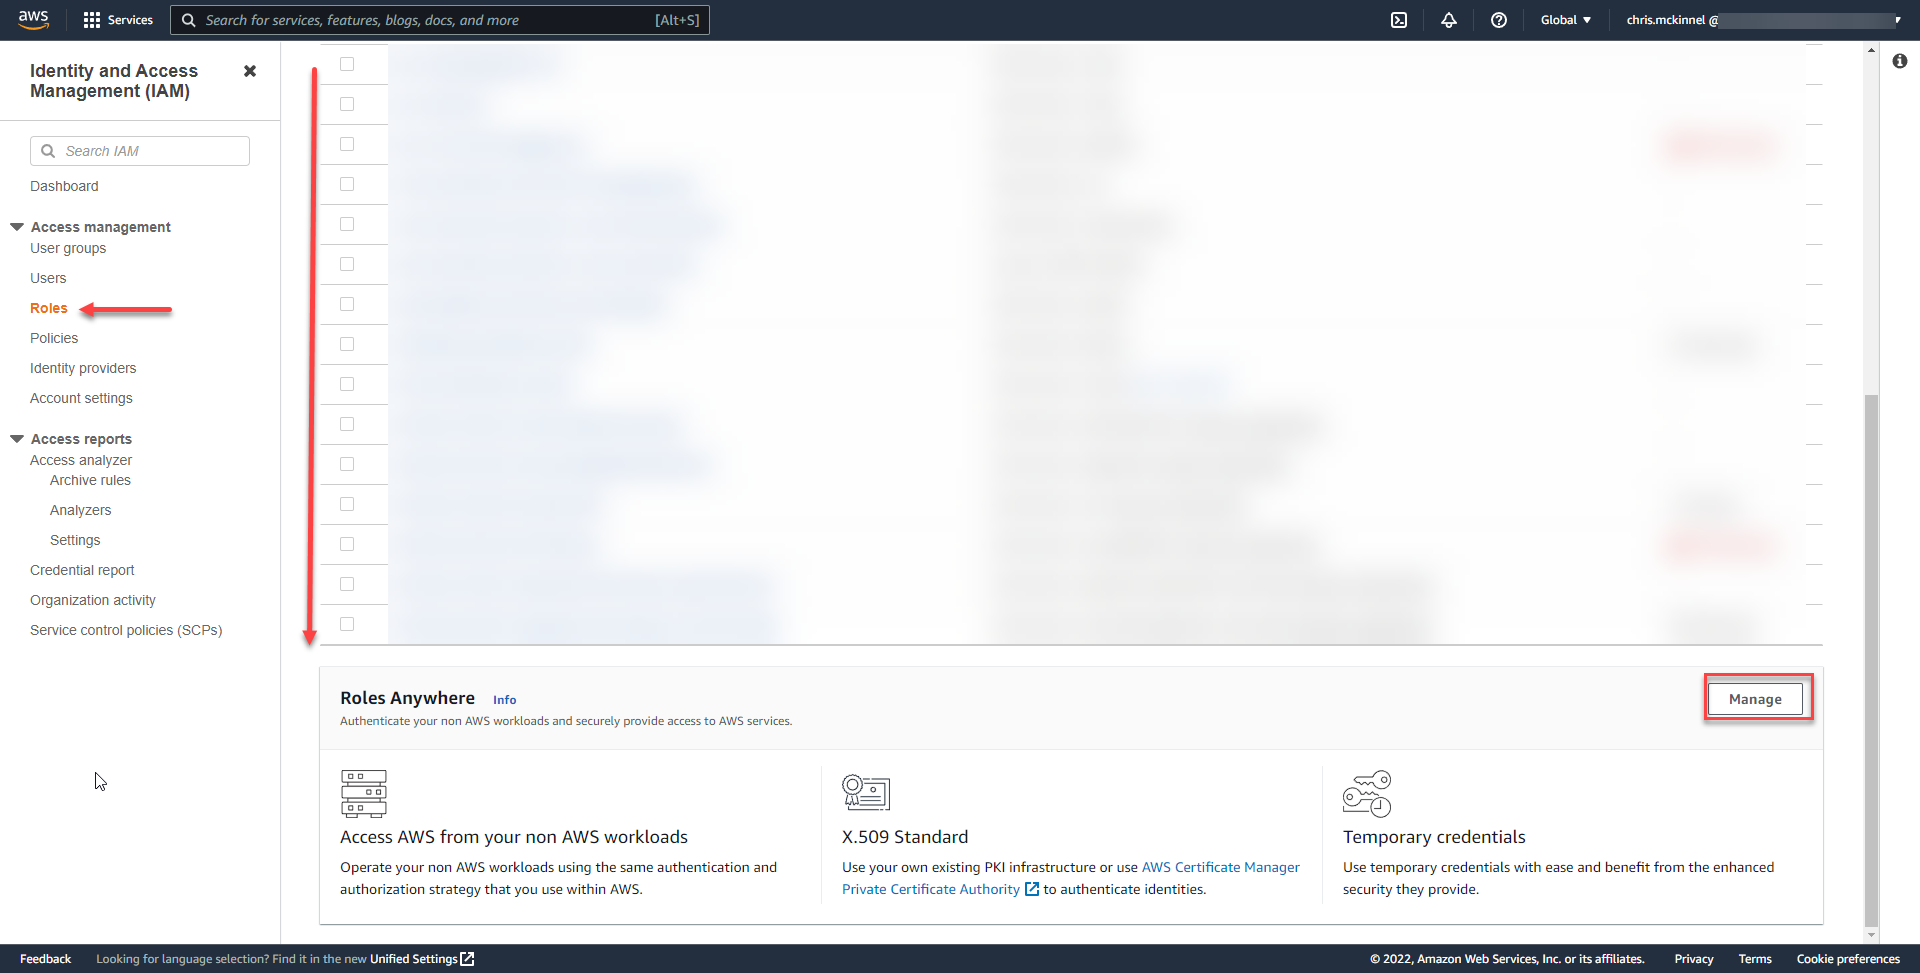
}Navigate to the IAM Roles Anywhere Dashboard. It's kind of hidden, so you need to go to IAM > Roles > scroll right to the bottom and click Manage.
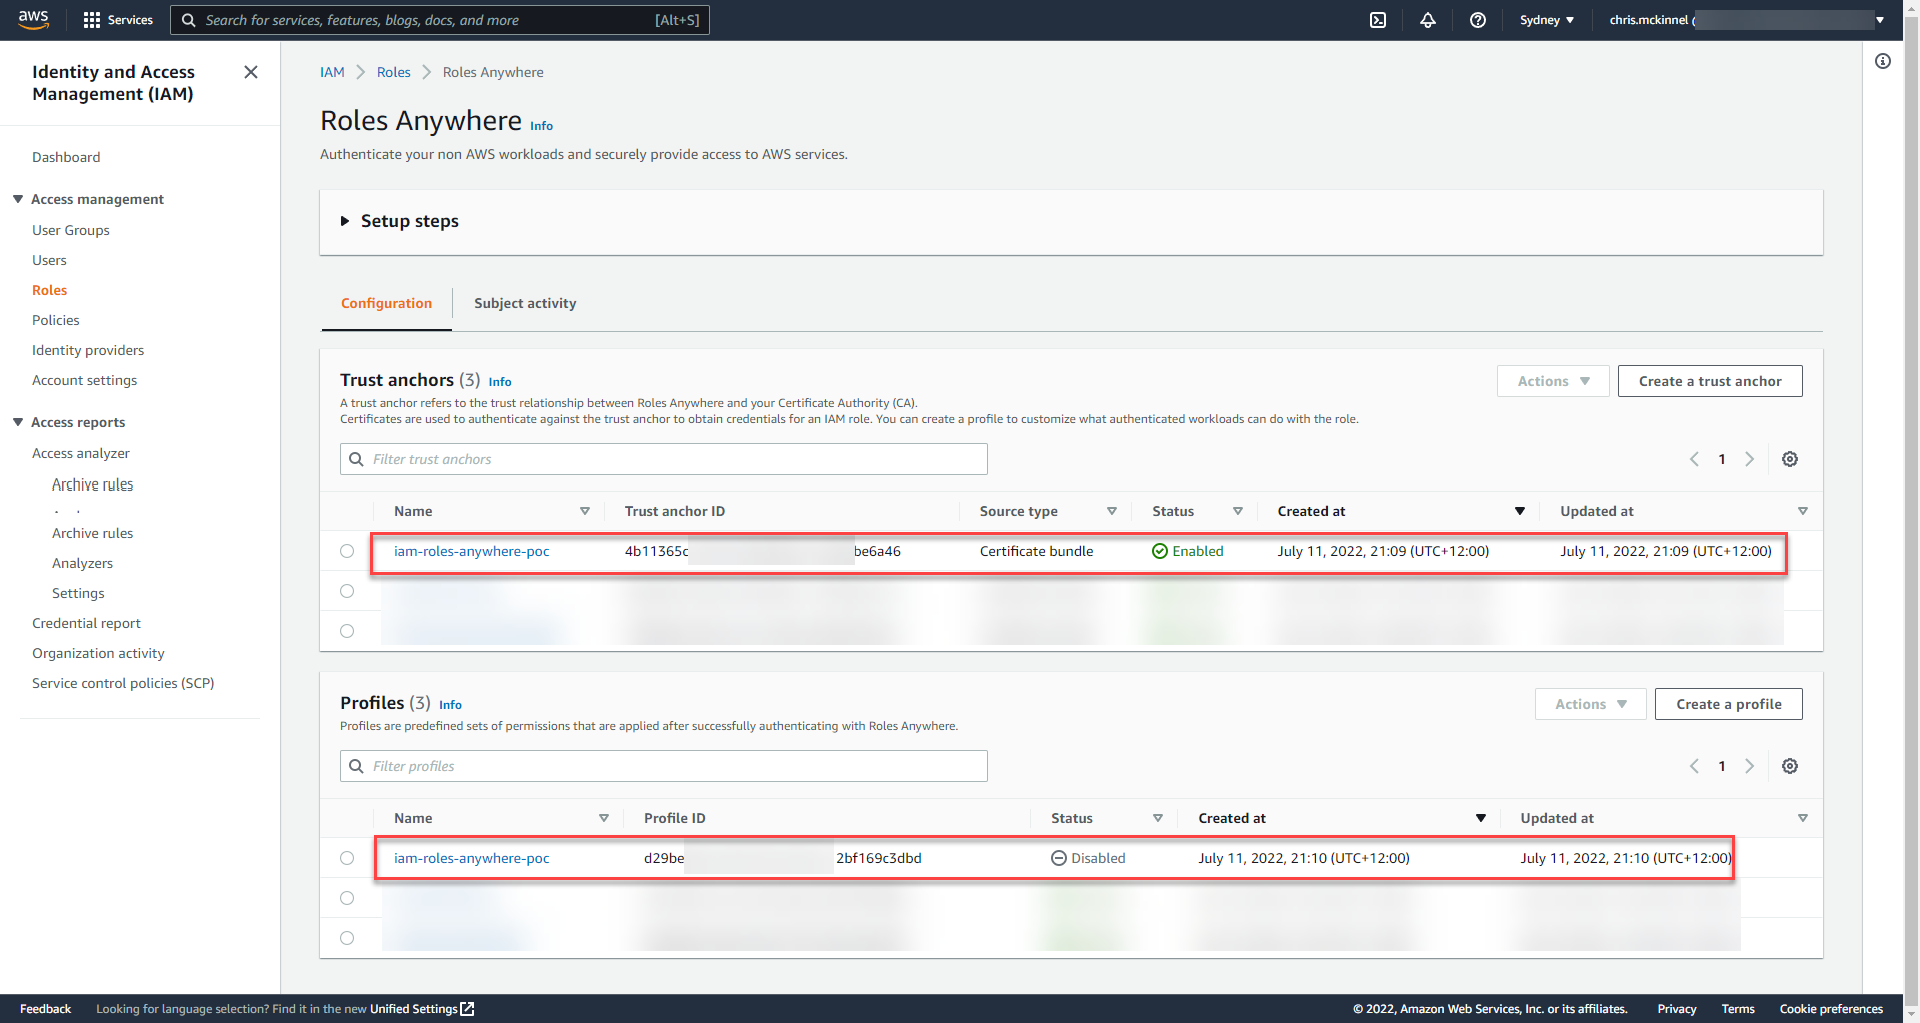
We can see that we now have a Trust Anchor and a Profile, which means we should be ready to test if this thing works!
But first, a public service announcement.
I ran into a few problems deploying the Trust Anchor and the Profile, so I've pasted in the errors I encountered below in case it leads anyone here - if this is how you found this page, then hopefully the full CloudFormation templates will help you.
Trust Anchor Errors
Properties validation failed for resource TrustAnchor with message: #/Source/SourceData: #: 0 subschemas matched instead of one #/Source/SourceData: expected type: JSONObject, found: String #/Source/SourceData: expected type: JSONObject, found: String
This error happened because I didn't include the X509CertificateData
block under SourceData for the AWS::RolesAnywhere::TrustAnchor
resource. Of course, this isn't mentioned anywhere in the CloudFormation
docs, but I managed to track it down in the API docs.
Properties validation failed for resource TrustAnchor with message: #/Source/SourceData: #: 0 subschemas matched instead of one #/Source/SourceData: required key [X509CertificateData] not found #/Source/SourceData: extraneous key [x509CertificateData] is not permitted #/Source/SourceData: required key [AcmPcaArn] not found #/Source/SourceData: extraneous key [x509CertificateData] is not permitted
This one was caused by using a lower case x in X509CertificateData.
It turns out the API docs use a lower case x, but CloudFormation
expects an uppercase x.
Properties validation failed for resource TrustAnchor with message: #: extraneous key [SourceType] is not permitted
This one was caused because of me having the wrong indent!
Profile Errors
Resource handler returned message: "null" (RequestToken: , HandlerErrorCode: InternalFailure)
This is caused by not including the DurationSeconds property
in the AWS::RolesAnywhere::Profile. The docs say this is not
required, but there's clearly a bug in handling the case when it's not provided,
or the docs are just wrong, and it is required.
Resource handler returned message: "1 validation error detected: Value null at 'name' failed to satisfy constraint: Member must not be null (Service: RolesAnywhere, Status Code: 400)
Self explanatory, but this one is because Name is required.
The CloudFormation docs actually say Name isn't required, which I assumed
was because CloudFormation would give it a name for us. Not so.
Anyway, let's test if this thing works. To test it, we need to use the
aws_signing_helper tool, which basically just calls the
credential_process feature that's available in the SDKs.
You can download the tool from here for your operating system: https://docs.aws.amazon.com/rolesanywhere/latest/userguide/credential-helper.html. We'll download the Linux one for our Ubuntu box.
wget https://s3.amazonaws.com/roles-anywhere-credential-helper/CredentialHelper/latest/linux_amd64/aws_signing_helper
--2022-07-11 09:10:16--  https://s3.amazonaws.com/roles-anywhere-credential-helper/CredentialHelper/latest/linux_amd64/aws_signing_helper
Resolving s3.amazonaws.com (s3.amazonaws.com)... 52.217.226.32
Connecting to s3.amazonaws.com (s3.amazonaws.com)|52.217.226.32|:443... connected.
HTTP request sent, awaiting response... 200 OK
Length: 13266672 (13M) [binary/octet-stream]
Saving to: ‘aws_signing_helper’

aws_signing_helper                                    100%[======================================================================================================================>]  12.65M  4.63MB/s    in 2.7s

2022-07-11 09:10:19 (4.63 MB/s) - ‘aws_signing_helper’ saved [13266672/13266672]
Before executing the binary, we need to make it executable.
chmod +x aws_signing_helper
Next, let's copy the cert and private key .pem files into
our home directory, and chown them to our user so we don't have to run
the singing helper as root (you can see where the actual certs live by
doing an ls -la on the sym-links from the output of certbot).
sudo cp /etc/letsencrypt/archive/iam-roles-anywhere.mckinnel.me/cert1.pem .
sudo cp /etc/letsencrypt/archive/iam-roles-anywhere.mckinnel.me/privkey1.pem .
sudo chown ubuntu:ubuntu *.pem
And finally let's query the CloudFormation stack to get some IDs we need to pass into the signing helper.
aws cloudformation describe-stacks \
--stack-name iam-roles-anywhere \
--query "Stacks[0].Outputs" \
--output text

Arn of the IAM Roles Anywhere Trust Anchor      TrustAnchorArn  arn:aws:rolesanywhere:ap-southeast-2:xxxxxxxx:trust-anchor/4b11365c-5207-xxxx-b061-c2ce9ebe6a46
Arn of the IAM Role     IAMRoleArn      arn:aws:iam::xxxxxxxx:role/iam-roles-anywhere-IAMRole-xxx
Name of the S3 bucket created   S3BucketName    iam-roles-anywhere-iamanywheretestbucket-xxxx
Arn of the IAM Roles Anywhere Profile   ProfileArn      arn:aws:rolesanywhere:ap-southeast-2:xxxxx:profile/d29beb30-a289-4523-xxxx-12bf169c3dbd
Finally! We're ready to call the signing helper and see if we can get some temporary credentials.
./aws_signing_helper credential-process \
--certificate cert1.pem \
--private-key privkey1.pem \
--trust-anchor-arn arn:aws:rolesanywhere:ap-southeast-2:xxxxxxxx:trust-anchor/4b11365c-5207-xxxx-b061-c2ce9ebe6a46 \
--profile-arn arn:aws:rolesanywhere:ap-southeast-2:xxxxx:profile/d29beb30-a289-4523-xxxx-12bf169c3dbd \
--role-arn arn:aws:iam::xxxxxxxx:role/iam-roles-anywhere-IAMRole-xxx
2022/07/11 09:36:04 AccessDeniedException: Unable to to perform one of sts:AssumeRole, sts:TagSession, or sts:SetSourceIdentity on provided role
This is where the party ends for the Let's Encrypt dream. The error I got was this:
AccessDeniedException: Unable to to perform one of sts:AssumeRole, sts:TagSession, or sts:SetSourceIdentity on provided role
After speaking with AWS Support, it sounds like this is caused by there being an apostrophe in the Issuer or Subject field of the certificate. I suspect this will be fixed soon, however it doesn't matter because you shouldn't be using a public CA as your Trust Anchor.
IAM Roles Anywhere with Hashicorp Vault
How about we try with Vault? Maybe this will give us a different result because we can actually provide the root CA as we'll generate it ourselves.
Using Vault also means we control which certificates we issue, so we don't need to worry about anybody else having valid certificates and guessing our ARNs.
The beauty of spending all that time writing IaC for the Let's Encrypt attempt above is, I can just re-use it all.
All we need to is download and run Vault on our EC2 instance, generate some more certificates and repeat the steps above (assuming the steps were correct - it doesn't work, after all).
We'll use docker to run Vault. I just followed the instructions
on the Ubuntu installation page in the Docker docs.
The commands I ran were:
sudo apt-get update
sudo apt-get install ca-certificates curl gnupg lsb-release
sudo mkdir -p /etc/apt/keyrings
curl -fsSL https://download.docker.com/linux/ubuntu/gpg | sudo gpg --dearmor -o /etc/apt/keyrings/docker.gpg
echo \
 "deb [arch=$(dpkg --print-architecture) signed-by=/etc/apt/keyrings/docker.gpg] https://download.docker.com/linux/ubuntu \
 $(lsb_release -cs) stable" | sudo tee /etc/apt/sources.list.d/docker.list > /dev/null
sudo apt-get update
sudo apt-get install docker-ce docker-ce-cli containerd.io docker-compose-plugin
sudo groupadd docker
sudo usermod -aG docker $USER
Make sure you log out and back in so you can run the docker
command as the ubuntu user.
The first thing we need to do is download and run Vault inside a docker container.
export VAULT_TOKEN="abc123"
export VAULT_ADDR='http://0.0.0.0:8200'
docker run --cap-add=IPC_LOCK -e 'VAULT_DEV_ROOT_TOKEN_ID=abc123' -p 8200:8200 --name iam-roles-anywhere-test -d vault:1.11.0
Unable to find image 'vault:1.11.0' locally
1.11.0: Pulling from library/vault
8663204ce13b: Pull complete
1f4d45ca1b2a: Pull complete
7459aeb2a319: Pull complete
2f019a19c088: Pull complete
22616ff81410: Pull complete
Digest: sha256:d45ffca3b9bc5f15f665c0afb581de668bca935ff1fffa10049648183c80ef6f
Status: Downloaded newer image for vault:1.11.0
1e02fe94cc68e1c3975c3d5942a3bf62085b726aad776e473dac07366d611f1c
To interact with Vault, we need to install the vault client.
wget -O- https://apt.releases.hashicorp.com/gpg | gpg --dearmor | sudo tee /usr/share/keyrings/hashicorp-archive-keyring.gpg
echo "deb [signed-by=/usr/share/keyrings/hashicorp-archive-keyring.gpg] https://apt.releases.hashicorp.com $(lsb_release -cs) main" | sudo tee /etc/apt/sources.list.d/hashicorp.list
sudo apt update && sudo apt install vault
Next, we enable secrets and generate a root CA.
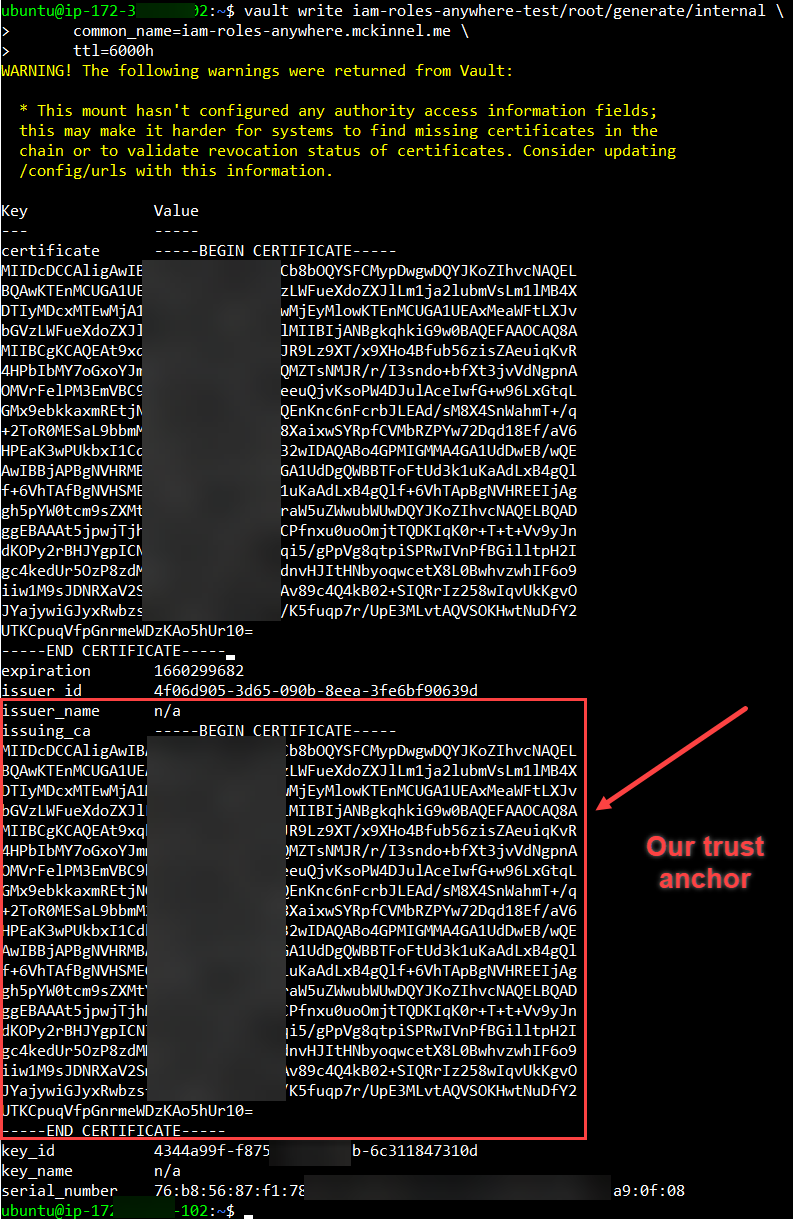
vault secrets enable -path=iam-roles-anywhere-test -description="IAM Roles Anywhere Test" pki
vault write iam-roles-anywhere-test/root/generate/internal \
common_name=iam-roles-anywhere.mckinnel.me \
ttl=6000h
This will spit out a certificate and the issuing CA. Copy the issuing
CA and save it to trust-anchor.pem. This is the certificate
we'll pass into IAM Roles Anywhere as our Trust Anchor source data.
Next, create a role that's allowed to generate a certificate for us.
vault write iam-roles-anywhere-test/roles/test \
allowed_domains=iam-roles-anywhere.mckinnel.me \
allow_bare_domains=true \
allow_subdomains=true
And let's go ahead and generate a cert + private keypair using our new CA.
vault write iam-roles-anywhere-test/issue/test \
ttl="100h" \
common_name="iam-roles-anywhere.mckinnel.me"
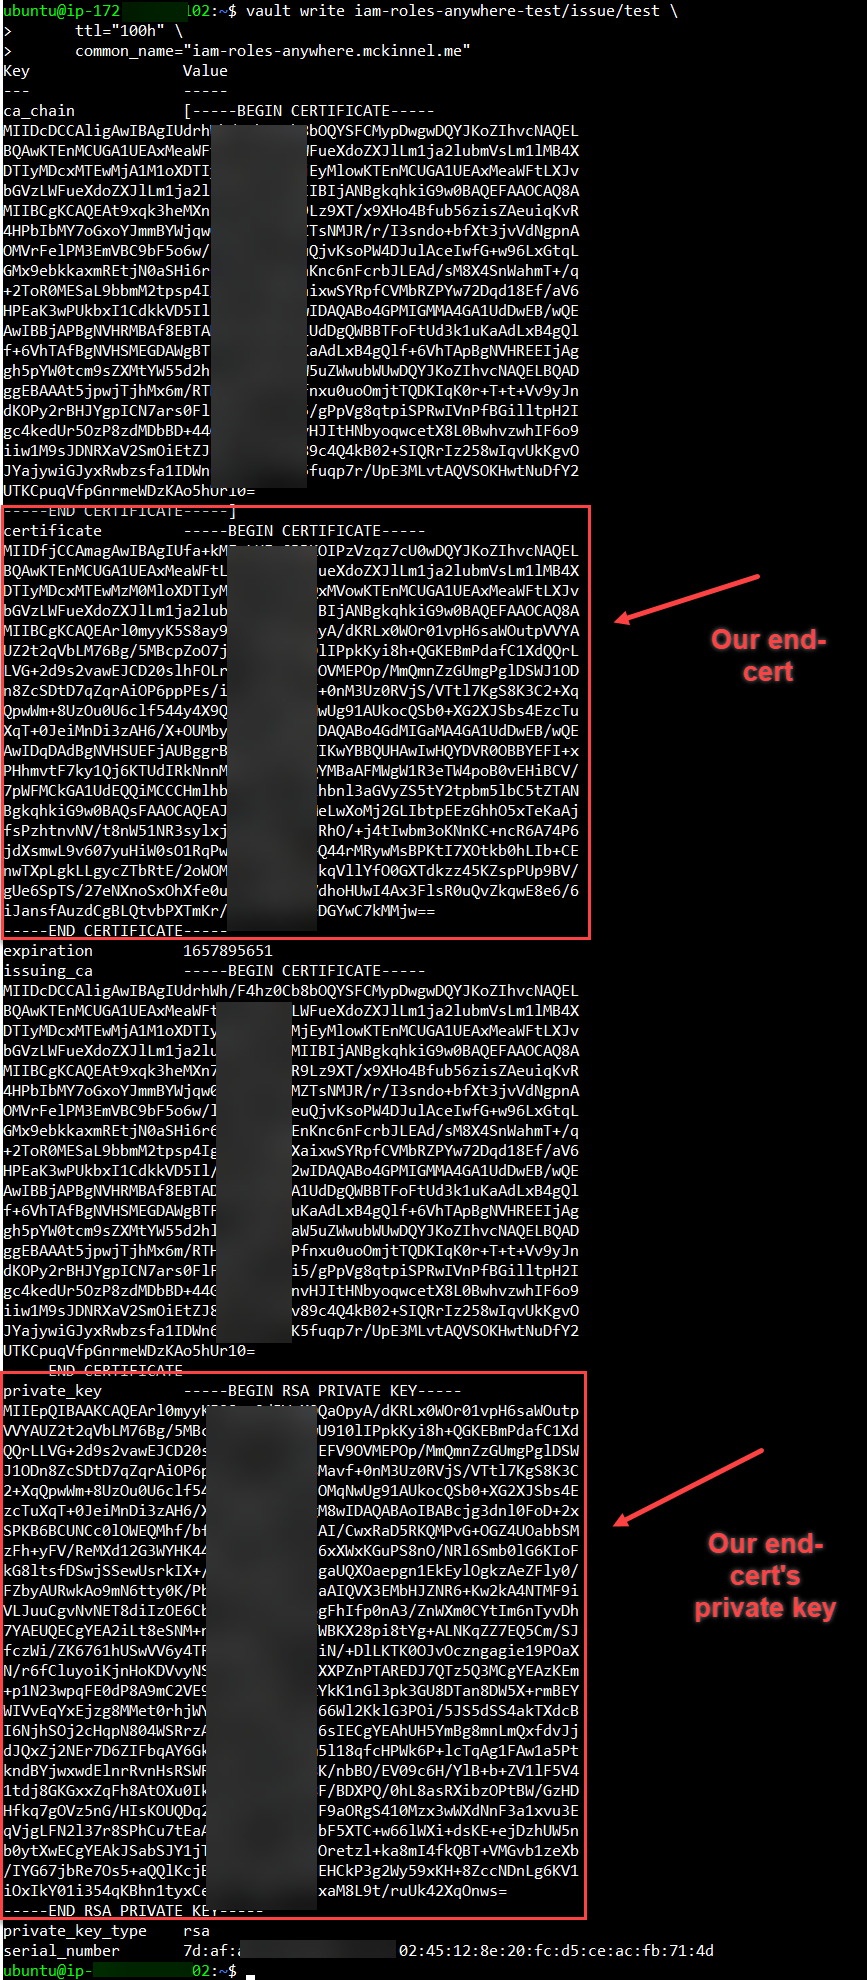
Save the cert labelled certificate as vault-cert.pem
and the private key as vault-private-key.pem.
We've got all we need now to update our Trust Anchor with the new root CA, and attempt another request for some temporary credentials.
Update your parameters.json file with the contents of
vault-trust-anchor.pem. Remember to squash it down onto one line
and replace the line endings with the \n sequence.
aws cloudformation update-stack \
--stack-name iam-roles-anywhere \
--template-body file://iam-roles-anywhere.yml \
--parameters file://parameters.json

{
    "StackId": "arn:aws:cloudformation:ap-southeast-2:xxxxxxxxxxx:stack/iam-roles-anywhere/xxxx"
}
Now let's try and re-run the signing helper call with our new cert and private key.
./aws_signing_helper credential-process \
--certificate vault-cert.pem \
--private-key vault-private-key.pem \
--trust-anchor-arn arn:aws:rolesanywhere:ap-southeast-2:xxxxxxxx:trust-anchor/4b11365c-5207-xxxx-b061-c2ce9ebe6a46 \
--profile-arn arn:aws:rolesanywhere:ap-southeast-2:xxxxx:profile/d29beb30-a289-4523-xxxx-12bf169c3dbd \
--role-arn arn:aws:iam::xxxxxxxx:role/iam-roles-anywhere-IAMRole-xxx
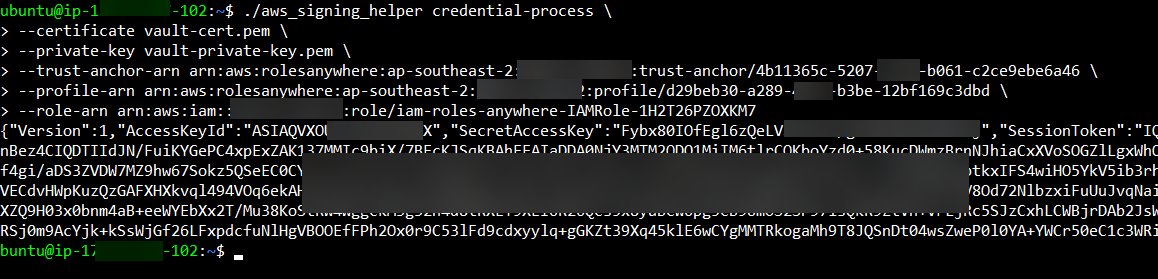
AWESOME! It worked! Now let's set the AWS CLI variables and test whether or not we can push an object to the S3 bucket we created earlier (which seems like another lifetime it was that long ago).
To test it, we need to install the AWSCLI.
sudo apt install awscli
And copy the values of AccessKeyId, SecretAccessKey
and SessionToken into some environment variables.
export AWS_ACCESS_KEY_ID=ASIAQxxx
export AWS_SECRET_ACCESS_KEY=Fybx80xxxx
export AWS_SESSION_TOKEN=IQoJb3Jpxxxxx
Finally we can call the AWS API with our temporary credentials.
aws sts get-caller-identity
{
    "UserId": "ARxxxxxx:7dafa4304b8b1c4c0xxxxxxx",
    "Account": "xxxxxxxxxx",
    "Arn": "arn:aws:sts::xxxxxxxxxxx:assumed-role/iam-roles-anywhere-IAMRole-1H2T26Pxxxxxxxxx/7dafa4304b8b1c4c02xxxxxxxxxx"
}
And now, we should be allowed to put an object in our S3 bucket, but not do anything else.
echo "test" > test-file
aws s3 cp test-file s3://iam-roles-anywhere-iamanywheretestbucket-xxxx/
upload: ./test-file to s3://iam-roles-anywhere-iamanywheretestbucket-xxxx/test-file
aws s3 ls s3://iam-roles-anywhere-iamanywheretestbucket-xxxx
An error occurred (AccessDenied) when calling the ListObjectsV2 operation: Access Denied
Excellent! We can see our role is working as expected, and we're authenticated using our X.509 Certificate instead of relying on long-lived API keys.
Summary
This feature is a bit of game-changer if you're interacting with AWS resources from the outside world. It reduces the attack surface and gives you more flexibility to automate your credential management, as well as re-use your existing PKI setup.
As far as new service releases go, it wasn't too bad - there were some bumps and the docs weren't perfect, but overall it was manageable.
I'm looking forward to seeing this thing used in anger.