Use AWS Client VPN To Access Private Resources
Posted by Chris McKinnel - 17 March 202111 minute read
One of the first things you learn when deploying resources into the cloud is the need to decide if they are a public facing resource, or a resource that should have no inbound exposure from the internet.
Sadly, the default VPC that AWS provides new accounts doesn't have a place to put your private resources - it's only got public subnets, so it's common for customers that are just starting their cloud journey to deploy everything into these public subnets which makes them internet facing. Not ideal!
One of the first things we do when deploying an AWS Landing Zone is remove the default VPC altogether to remove this temptation, and deploy a new VPC with private subnets.
Generally we'll deploy only private subnets in Sandbox / Development accounts, and most of the time in Test / QA accounts as well. If a customer needs inbound internet access to these accounts, we'll recommend they use a VPN instead of exposing their resources over the internet in public subnets.
For production accounts, usually there is some kind of website being served by the customer, so we'll have a public subnet that holds resources that the AWS edge services like CloudFront, API Gateway, WAF, etc, can integrate with.
With all of that being said, there are a heap of ways to protect your resources from the big, bad internet in AWS, even when you do deploy them as internet facing. If your resource doesn't need to be accessed via the internet then it's best to just put it somewhere where there is no inbound connectivity allowed from the internet.
Here's a simplified diagram of a hub-and-spoke network in AWS, with only non-production and production spokes:
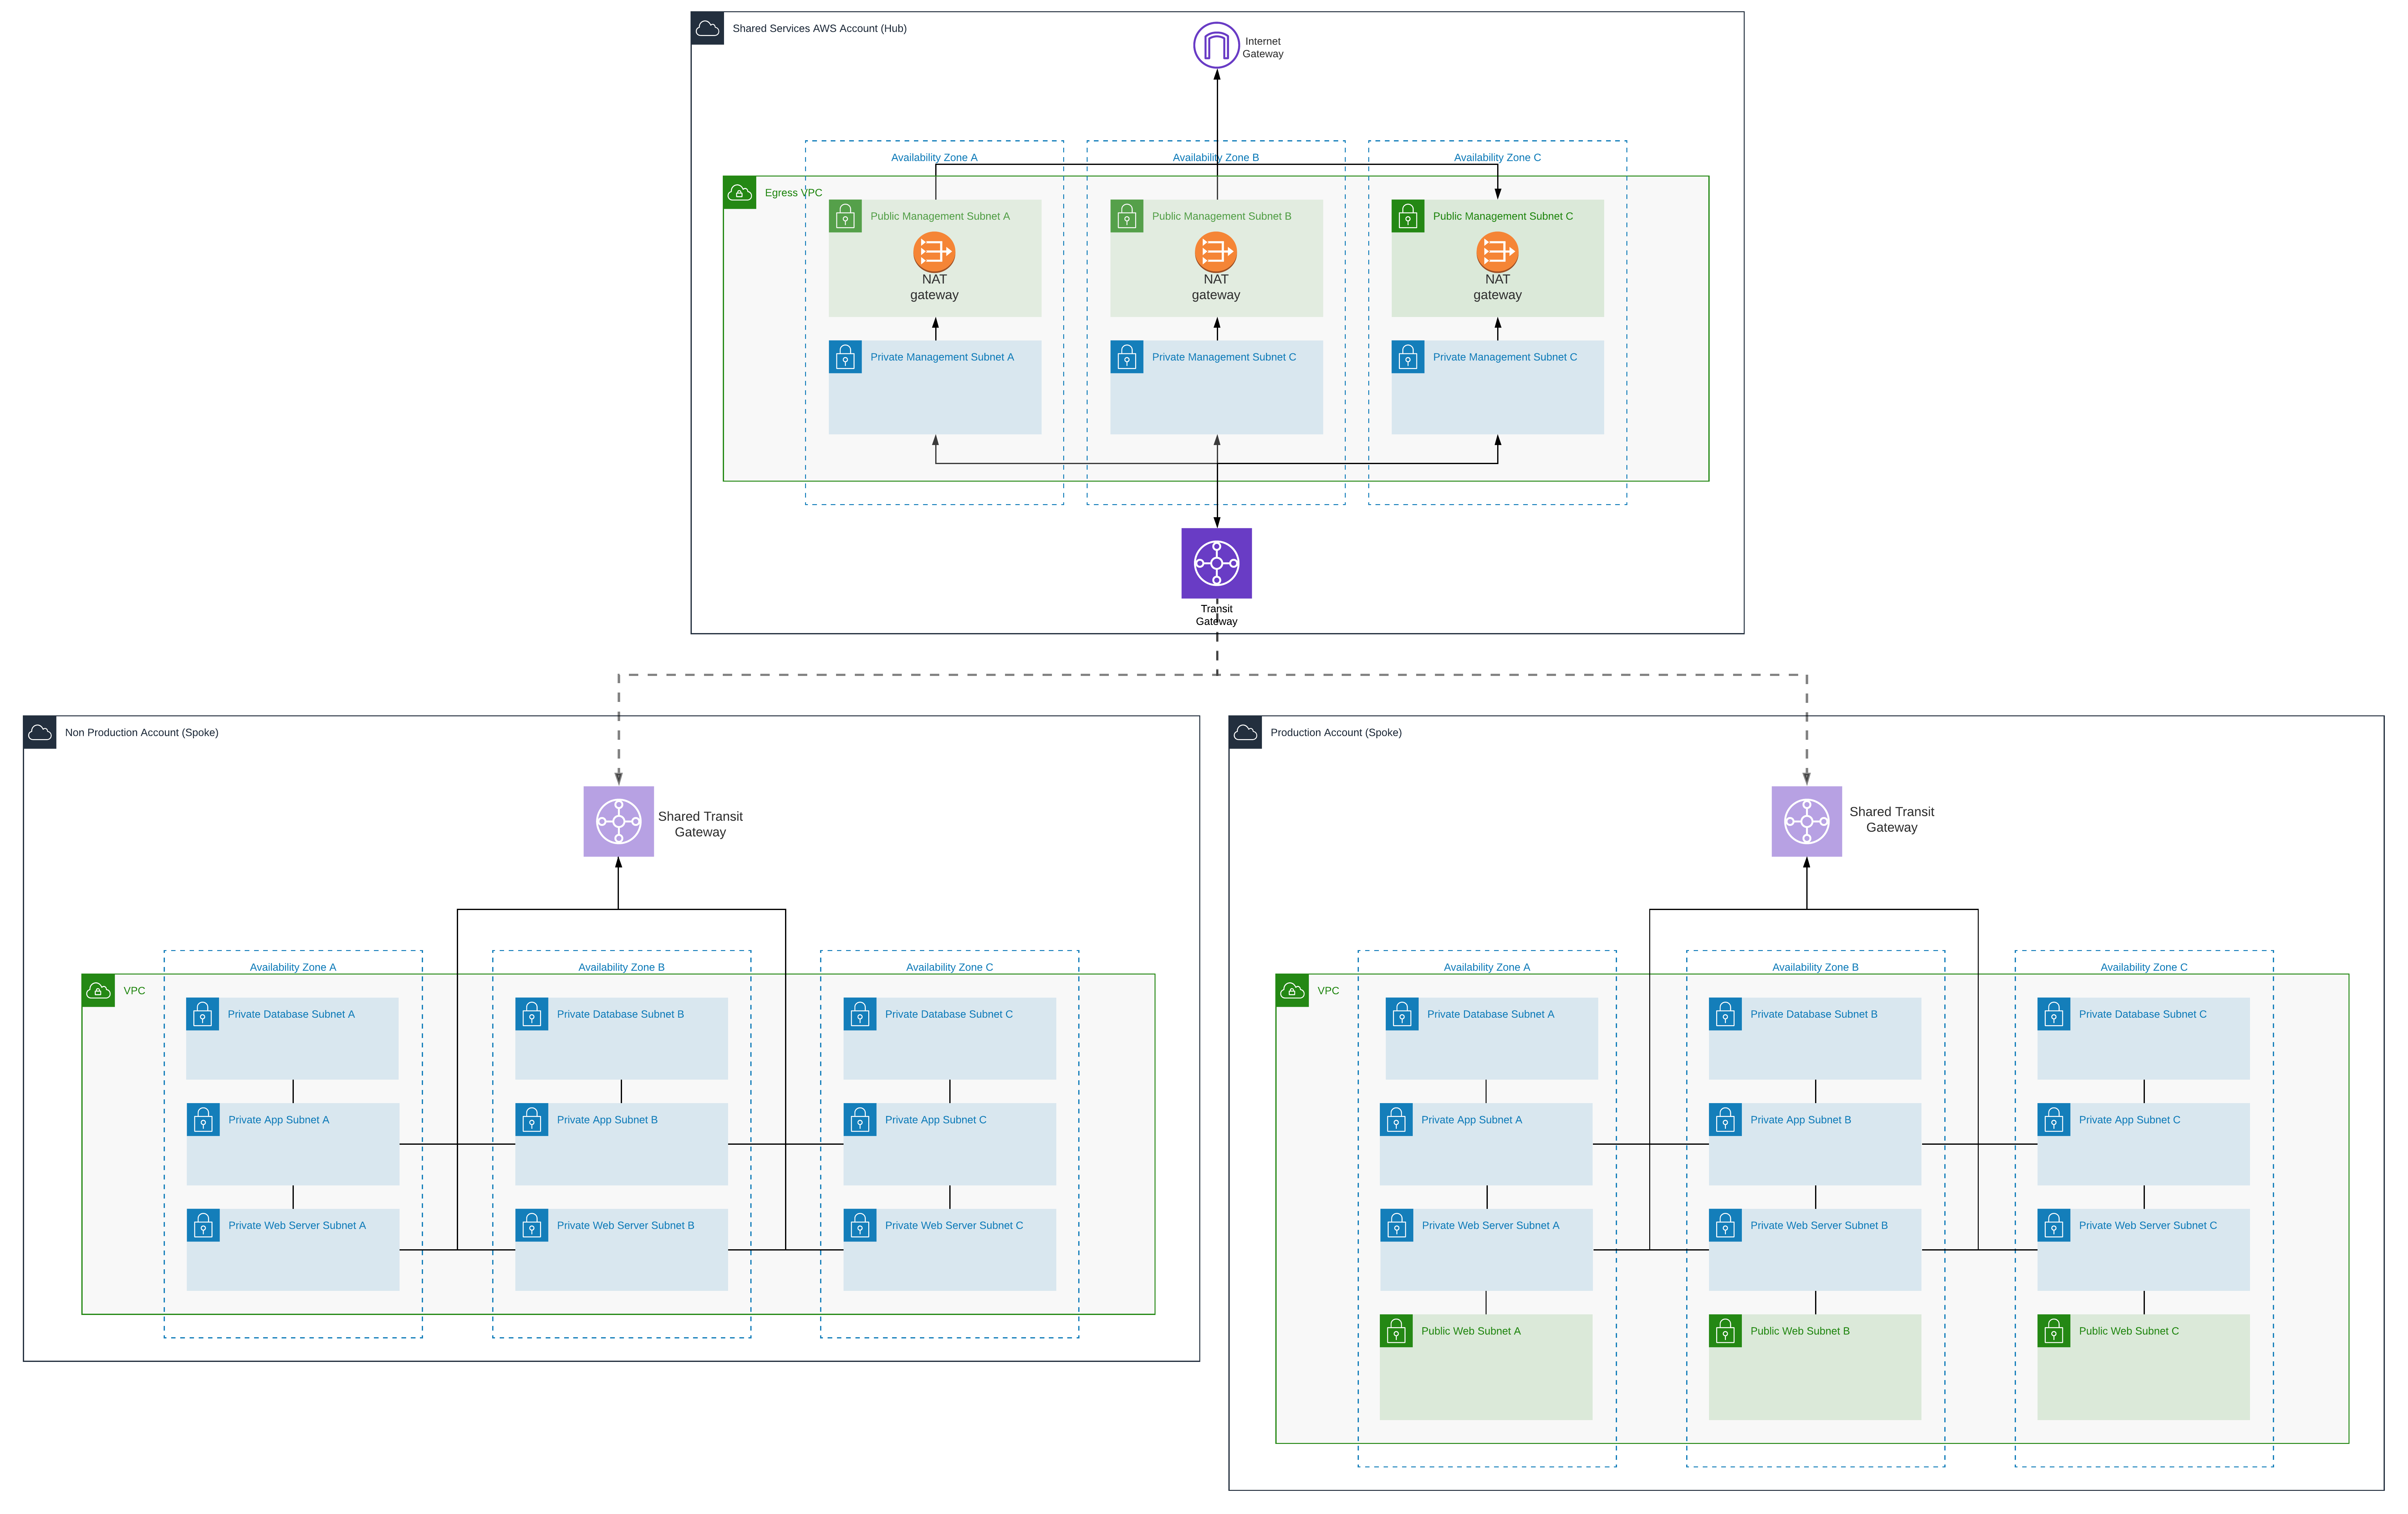 Right-click > open image in a new tab for a higher resolution image.
Note the lack of public subnets in the non-production account.
Accessing private resources
I often get asked how to log into EC2 instances deployed into the private subnets, and there are actually a heap of ways you can do it - each with a different security posture:
- Move it to a public subnet (boo)
- Create a new public subnet and move it in here (boo)
- Deploy a bastion host / jump box in the shared services account (better, but still boo)
- Use AWS SSM Session Manager to get an SSH session from a browser (better!)
- Deploy AWS Client VPN
- Some other way (there are a few)
Session manager is a fine solution for this, but things get a little tricky when you want to serve a website over your private network and not just open an SSH or RDP session.
For this use-case, I recommend my customers use some kind of VPN.
Enter, AWS Client VPN
Previously we would have had to to set up some kind of hosted VPN solution like putting strongSwan or openVPN on an EC2 instance in a public subnet somewhere, but now AWS offer a Client VPN solution which is pretty easy to set up.
From the AWS docs:
AWS Client VPN is a managed client-based VPN service that enables you to securely access your AWS resources and resources in your on-premises network. With Client VPN, you can access your resources from any location using an OpenVPN-based VPN client.
Deploying AWS Client VPN
Let's go ahead and deploy AWS Client VPN to get access to our private resources.
Assumptions:
- You're rocking a standard multi-account structure (let's say shared-services, dev and test accounts)
- You've got a standard hub-and-spoke network in place using Transit Gateway
- You've got your Transit Gateway routes set up so your egress VPC can talk to your spoke VPCs
We're going to use certificate authentication so the AWS Client VPN can authenticate with our AWS account. To do this, we need to generate some certificates and upload them to Amazon Certificate Manager before we deploy our Client VPN.
You'll probably want to use something a little more robust for your customers, but for the purposes of illustrating how this works we'll use Easy RSA to create a Private Key Infrastructure locally, generate our own CA and use it to generate some certificates.
Clone the Easy RSA repo
from OpenVPN and change directories to the easyrsa3 directory.
git clone https://github.com/OpenVPN/easy-rsa.git

Cloning into 'easy-rsa'...
remote: Enumerating objects: 2082, done.
remote: Total 2082 (delta 0), reused 0 (delta 0), pack-reused 2082
Receiving objects: 100% (2082/2082), 11.70 MiB | 19.20 MiB/s, done.
Resolving deltas: 100% (911/911), done.

cd easy-rsa/easyrsa3/
Next we initialise a Private Key Infrastructure:
./easyrsa init-pki

init-pki complete; you may now create a CA or requests.
Your newly created PKI dir is: /home/ec2-user/environment/aws-client-vpn-test/easy-rsa/easyrsa3/pki
Next we create a Certificate Authority, and when prompted for a Common Name we'll use aws-client-vpn-test.com.
./easyrsa build-ca nopass

Using SSL: openssl OpenSSL 1.1.1h  22 Sep 2020
Generating RSA private key, 2048 bit long modulus (2 primes)
........................+++++
...........................................................................+++++
e is 65537 (0x010001)
You are about to be asked to enter information that will be incorporated
into your certificate request.
What you are about to enter is what is called a Distinguished Name or a DN.
There are quite a few fields but you can leave some blank
For some fields there will be a default value,
If you enter '.', the field will be left blank.
-----
Common Name (eg: your user, host, or server name) [Easy-RSA CA]:aws-client-vpn-test.com

CA creation complete and you may now import and sign cert requests.
Your new CA certificate file for publishing is at:
/home/ec2-user/environment/aws-client-vpn-test/easy-rsa/easyrsa3/pki/ca.crt
Now that we've got a CA, we can generate a client and server certificate. Let's do the server certificate first:
./easyrsa build-server-full aws-client-vpn-test.com nopass

Using SSL: openssl OpenSSL 1.1.1h  22 Sep 2020
Generating a RSA private key
........+++++
.......................+++++
writing new private key to '/home/ec2-user/environment/aws-client-vpn-test/easy-rsa/easyrsa3/pki/easy-rsa-16871.FWT2qM/tmp.H8h4Mu'
-----
Using configuration from /home/ec2-user/environment/aws-client-vpn-test/easy-rsa/easyrsa3/pki/easy-rsa-16871.FWT2qM/tmp.3X0HFb
Check that the request matches the signature
Signature ok
The Subject's Distinguished Name is as follows
commonName            :ASN.1 12:'aws-client-vpn-test.com'
Certificate is to be certified until Jun 19 07:56:05 2023 GMT (825 days)

Write out database with 1 new entries
Data Base Updated
And finally create a client certificate. Note that you should create a client certificate for everyone that needs to connect to your VPN - this gives you the ability to revoke certificates and also audit the activities of the people connected to the VPN using their certifcate.
./easyrsa build-client-full chrismckinnel.aws-client-vpn-test.com nopass
Using SSL: openssl OpenSSL 1.1.1h  22 Sep 2020
Generating a RSA private key
.............................................................................................+++++
.+++++
writing new private key to '/home/ec2-user/environment/aws-client-vpn-test/easy-rsa/easyrsa3/pki/easy-rsa-18172.rTuTpE/tmp.Ft7aE8'
-----
Using configuration from /home/ec2-user/environment/aws-client-vpn-test/easy-rsa/easyrsa3/pki/easy-rsa-18172.rTuTpE/tmp.V1Rz6b
Check that the request matches the signature
Signature ok
The Subject's Distinguished Name is as follows
commonName            :ASN.1 12:'chrismckinnel.aws-client-vpn-test.com'
Certificate is to be certified until Jun 19 08:05:36 2023 GMT (825 days)

Write out database with 1 new entries
Data Base Updated
OK - we should now have the following files:
Root CA Certificate: pki/ca.crt
Server Certificate: pki/issued/aws-client-vpn-test.com.crt
Client Certificate: pki/issued/chrismckinnel.aws-client-vpn-test.com.crt
Server Private Key: pki/private/aws-client-vpn-test.com.key
Client Private Key: pki/private/chrismckinnel.aws-client-vpn-test.com.key
We can upload these directly to Amazon Certificate Manager so they are usable when we deploy our VPN Endpoint.
aws acm import-certificate --certificate fileb://pki/issued/aws-client-vpn-test.com.crt --private-key fileb://pki/private/aws-client-vpn-test.com.key --certificate-chain fileb://pki/ca.crt --region ap-southeast-2
{
    "CertificateArn": "arn:aws:acm:ap-southeast-2:317xxxxxxxxx:certificate/6b3xxxxx-0a87-403b-xxxx-30axxxxxxxxx"
}
Note that we don't have to upload the client certificate to ACM because our root CA is the same for our server and our client certificates. There isn't a huge amount in the AWS documentation on this, but it is mentioned on the mutual auth docs page.
You should be able to check the ACM console and see you have a certificate provisioned.

Great, now we're ready to write some CloudFormation to deploy our Client VPN endpoint that we can use to get on the private network.
infra.yml
---
AWSTemplateFormatVersion: '2010-09-09'
Description: 'Deploy the Client VPN'

Parameters:
  ServerCertificateArn:
    Type: String
    Description: ARN of the server certificate used for the VPN endpoint

  ClientCidrBlock:
    Type: String
    AllowedPattern: '^(([0-9]|[1-9][0-9]|1[0-9]{2}|2[0-4][0-9]|25[0-5])\.){3}([0-9]|[1-9][0-9]|1[0-9]{2}|2[0-4][0-9]|25[0-5])(\/([0-9]|[1-2][0-9]|3[0-2]))$'
    Description: CIDR range for the clients connecting to the VPN

  DevVPCCIDRBlock:
    Type: String
    AllowedPattern: '^(([0-9]|[1-9][0-9]|1[0-9]{2}|2[0-4][0-9]|25[0-5])\.){3}([0-9]|[1-9][0-9]|1[0-9]{2}|2[0-4][0-9]|25[0-5])(\/([0-9]|[1-2][0-9]|3[0-2]))$'
    Description: CIDR range for the Dev VPC

  TestVPCCIDRBlock:
    Type: String
    AllowedPattern: '^(([0-9]|[1-9][0-9]|1[0-9]{2}|2[0-4][0-9]|25[0-5])\.){3}([0-9]|[1-9][0-9]|1[0-9]{2}|2[0-4][0-9]|25[0-5])(\/([0-9]|[1-2][0-9]|3[0-2]))$'
    Description: CIDR range for the Test VPC

  EgressVPCId:
    Type: AWS::EC2::VPC::Id
    Description: VPC ID of the Egress VPC

  PrivateSubnetAId:
    Type: AWS::EC2::Subnet::Id
    Description: Subnet ID of private subnet A

  PrivateSubnetBId:
    Type: AWS::EC2::Subnet::Id
    Description: Subnet ID of private subnet B

Resources:

  VPNSecurityGroup:
    Type: AWS::EC2::SecurityGroup
    Properties:
      GroupDescription: "Security group for VPN endpoint"
      Tags:
        - Key: Name
          Value: 'client-vpn-endpoint'
        - Key: ProjectIdentifier
          Value: 'Core'
      VpcId: !Ref EgressVPCId

  ClientVPNEndpointLogsGroup:
    Type: AWS::Logs::LogGroup

  ClientVpnEndpoint:
    Type: AWS::EC2::ClientVpnEndpoint
    Properties:
      AuthenticationOptions:
      - Type: "certificate-authentication"
        MutualAuthentication:
          ClientRootCertificateChainArn: !Ref ServerCertificateArn
      ClientCidrBlock: !Ref ClientCidrBlock
      ConnectionLogOptions:
        Enabled: true
        CloudwatchLogGroup: !Ref ClientVPNEndpointLogsGroup

      Description: "Client VPN Endpoint"
      SecurityGroupIds:
        - !GetAtt VPNSecurityGroup.GroupId
      ServerCertificateArn: !Ref ServerCertificateArn
      SplitTunnel: true
      VpcId: !Ref EgressVPCId
      TransportProtocol: "udp"

  EgressVPCSubnetAAssociation:
    Type: AWS::EC2::ClientVpnTargetNetworkAssociation
    Properties:
      ClientVpnEndpointId:
        Ref: ClientVpnEndpoint
      SubnetId: !Ref PrivateSubnetAId

  EgressVPCSubnetBAssociation:
    Type: AWS::EC2::ClientVpnTargetNetworkAssociation
    Properties:
      ClientVpnEndpointId:
        Ref: ClientVpnEndpoint
      SubnetId: !Ref PrivateSubnetBId

  AuthoriseDevVPCRule:
    Type: AWS::EC2::ClientVpnAuthorizationRule
    Properties:
      AuthorizeAllGroups: true
      ClientVpnEndpointId: !Ref ClientVpnEndpoint
      Description: "Authorise Development VPC"
      TargetNetworkCidr: !Ref DevVPCCIDRBlock

  AuthoriseTestVPCRule:
    Type: AWS::EC2::ClientVpnAuthorizationRule
    Properties:
      AuthorizeAllGroups: true
      ClientVpnEndpointId: !Ref ClientVpnEndpoint
      Description: "Authorise Test VPC"
      TargetNetworkCidr: !Ref TestVPCCIDRBlock

  DevVPCSubnetARoute:
    Type: AWS::EC2::ClientVpnRoute
    DependsOn: EgressVPCSubnetAAssociation
    Properties:
      ClientVpnEndpointId: !Ref ClientVpnEndpoint
      Description: "Route to Dev VPC via Subnet A"
      DestinationCidrBlock: !Ref DevVPCCIDRBlock
      TargetVpcSubnetId: !Ref PrivateSubnetAId

  DevVPCSubnetBRoute:
    Type: AWS::EC2::ClientVpnRoute
    DependsOn: EgressVPCSubnetBAssociation
    Properties:
      ClientVpnEndpointId: !Ref ClientVpnEndpoint
      Description: "Route to Dev VPC via Subnet B"
      DestinationCidrBlock: !Ref DevVPCCIDRBlock
      TargetVpcSubnetId: !Ref PrivateSubnetBId

  TestVPCSubnetARoute:
    Type: AWS::EC2::ClientVpnRoute
    DependsOn: EgressVPCSubnetAAssociation
    Properties:
      ClientVpnEndpointId: !Ref ClientVpnEndpoint
      Description: "Route to Test VPC via Subnet A"
      DestinationCidrBlock: !Ref TestVPCCIDRBlock
      TargetVpcSubnetId: !Ref PrivateSubnetAId

  TestVPCSubnetBRoute:
    Type: AWS::EC2::ClientVpnRoute
    DependsOn: EgressVPCSubnetBAssociation
    Properties:
      ClientVpnEndpointId: !Ref ClientVpnEndpoint
      Description: "Route to Test VPC via Subnet B"
      DestinationCidrBlock: !Ref TestVPCCIDRBlock
      TargetVpcSubnetId: !Ref PrivateSubnetBId
The key parts of the CloudFormation template above are:
- We reference the Server certificate when we create the VPN Endpoint
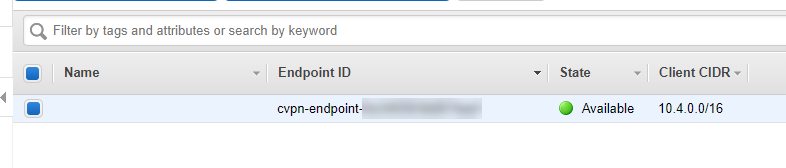
- We defined a client CIDR block - our clients get an IP address from this range when they connect
- We assign a couple of subnets to our Client VPN - traffic can transit through these subnets across the Transit Gateway into other VPCs
- We need to authorise the CIDR ranges of our dev and test VPCs for the VPN endpoint to allow connectivity to them
- We set up some VPN routes to allow us to connect to the target subnets in the spoke accounts
We'll also need to create a parameters file and populate it with our server certificate ARN, VPC CIDR ranges and subnet IDs.
parameters.json
[
  {
    "ParameterKey": "ServerCertificateArn",
    "ParameterValue": ""
  },
  {
    "ParameterKey": "ClientCidrBlock",
    "ParameterValue": ""
  },
  {
    "ParameterKey": "DevVPCCIDRBlock",
    "ParameterValue": ""
  },
  {
    "ParameterKey": "TestVPCCIDRBlock",
    "ParameterValue": ""
  },
  {
    "ParameterKey": "EgressVPCId",
    "ParameterValue": ""
  },
  {
    "ParameterKey": "PrivateSubnetAId",
    "ParameterValue": ""
  },
  {
    "ParameterKey": "PrivateSubnetBId",
    "ParameterValue": ""
  }
]
We can deploy our CloudFormation template with:
aws cloudformation create-stack --stack-name client-vpn --template-body file://infra.yml --parameters file://parameters.json
{
"StackId": "arn:aws:cloudformation:ap-southeast-2:3xxxxxxxxxx:stack/client-vpn/xxxxxxxx-8696-11eb-bd7f-xxxxxxxxxxxx"
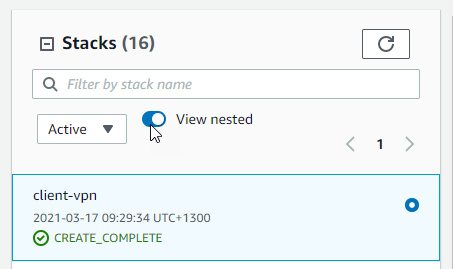
}After 10 minutes or so, the stack should deploy successfully:
Testing the VPN
Let's create an EC2 instance in the private subnet of the development VPC. We'll use this instance to test our VPN is working correctly.
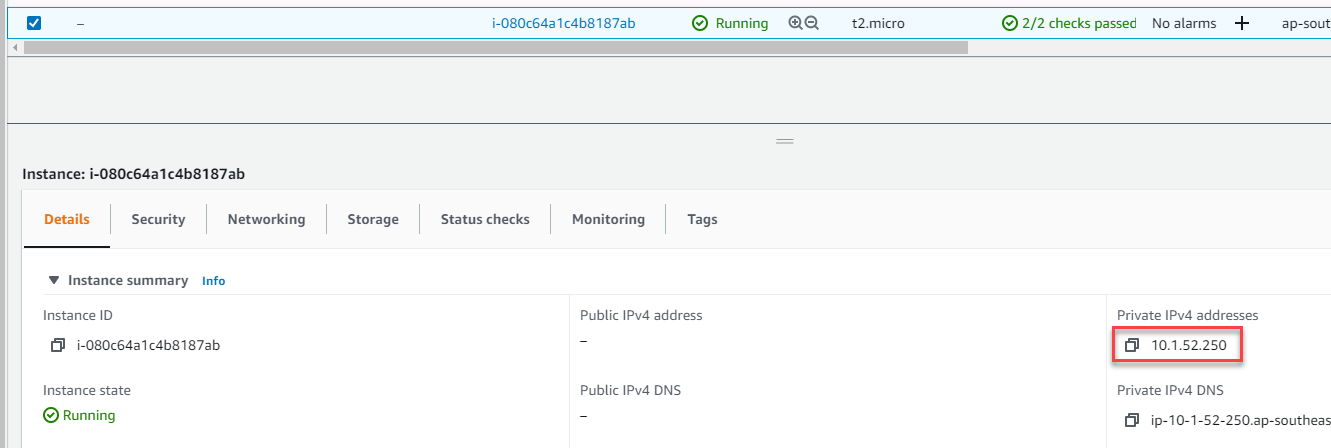
Make a note of the private IP address that the EC2 instnace gets, as we'll need it when we attempt to SSH over the VPN.
We'll need to add some security group rules to the EC2 instance's security group. We need to open up port 22 for SSH, and port 8080 as we're going to test SSH and hosting a simple website.

Next we need to download the OpenVPN configuration file from the VPN Endpoint and make some changes to it before it's ready to use.
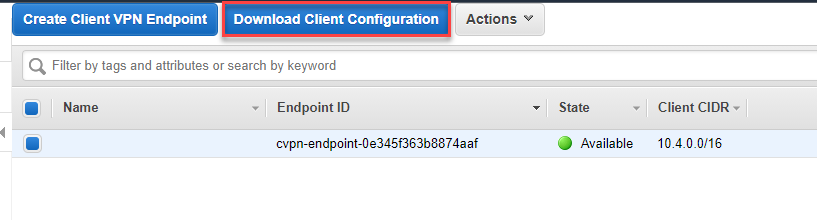
You can also do this with the CLI:
$ aws ec2 export-client-vpn-client-configuration --client-vpn-endpoint-id endpoint_id --output text>config_filename.ovpn
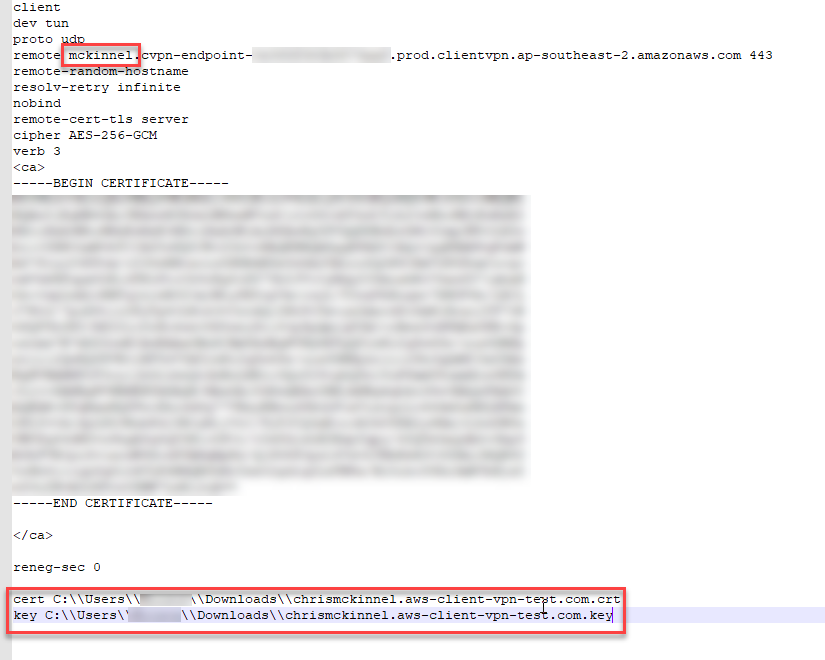
According to the AWS docs, we need to add a random string to the start of
the VPN Endpoint DNS name in the configuration file. I haven't been able to
find a huge amount of detail about why we need to do this, but I have a
hunch it's something to do with --remote-random-hostname flag
you can pass into OpenVPN that prepends a 6-digit string to the hostname
to make sure that the DNS hostname doesn't get cached.
For my config file, I just prepended mckinnel. to the VPN Endpoint
DNS name.
We also need to tell the configuration file where our client certificate and our private key live. Embarassingly, I'm on a Windows machine as you can see from the file paths below!
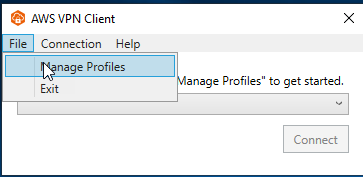
Now we're ready to download the AWS Client VPN desktop application and create a new profile using the client configuration file.
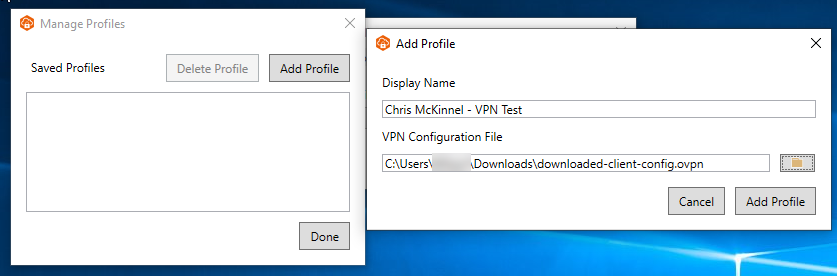
Now we can create a new profile in the AWS VPN Client:
Before we connect to the VPN, let's prove that we can't SSH into our test instance:

Great, we didn't expect that to work because the instance is in the private subnet and doesn't have any inbound internet connectivity configured. Now let's hit Connect and see if that makes a difference to us being able to connect.

Perfect! We're connected to our private VPC via a VPN, and we can SSH into our private EC2 instances.
Hitting a private web server over the VPN
It's important to note that if all you want to do is SSH into your private machines, then a VPN might be overkill. A better option might be to use AWS Systems Manager - Session Manager to open an SSH session via your browser.
In our case, though, we want to be able to browse to web applications that are hosted in our private subnets. You can do this with SSH port forwarding but that becomes a bit of a pain when you have to forward the ports to your instances every time you want to hit your dev / test web app deployments.
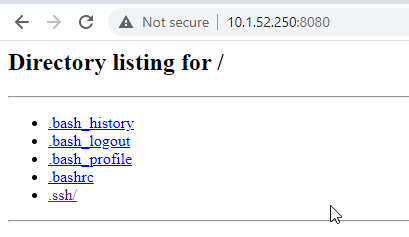
On the EC2 instance that we've SSH'd into over the VPN, run the following command to get a super simple HTTP server running:
python -m SimpleHTTPServer 8080
Serving HTTP on 0.0.0.0 port 8080 ...
Now we can hit the private IP address of our instance in a web browser on port 8080 and demonstrate that we can hit our private web apps that live in development / test accounts in private subnets.
Summary
In this post we explored how to deploy and configure AWS Client VPN to a standard hub-and-spoke network model in AWS. If you need to hit your web applications in your private subnets, a VPN might be the right tool for the job for you.